Connection
This guide explains how to connect the library to different types of OBDII adapters and start communicating with your vehicle.
Understanding Adapters
An OBDII adapter is a small physical device that acts as a bridge between your vehicle’s diagnostic port and your computer, Raspberry Pi, smartphone, etc..
It plugs into the vehicle’s OBDII diagnostic port (female connector), usually found under the dashboard or near the steering wheel, you can check online for your vehicle’s exact location.
It converts the car’s data signals into a standard format that our library can read.
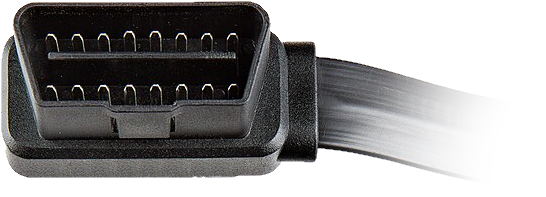
The image below shows a male OBDII connector, which is the adapter side that plugs into your vehicle’s diagnostic port.
Tip
Don’t have hardware ? Follow the Emulating a Vehicle guide.
Connect your Adapter
Plug the OBDII adapter into your vehicle’s diagnostic port.
Turn the ignition to the “ON” position (engine does not need to start).
Identify your adapter’s connection type.
Connecting via USB
Use this method if your adapter connects via USB cable.
Identify the USB serial port:
$ dmesg | grep ttyNote
You can also list available USB serial devices with:
$ ls /dev/ttyUSB*Choose the correct port from the output (e.g.,
/dev/ttyUSB0).Use this port for connecting.
Identify the COM port:
chgportNote
You can also find the COM port in “Device Manager” under “Ports (COM & LPT)”.
Choose the corresponding COM port (e.g.,
COM3).Use this port for connecting.
Untested, help us improve this part of the documentation. Contribute
Connecting via Bluetooth
Use this method if your adapter communicates wirelessly over Bluetooth.
Open the Bluetooth control terminal:
$ bluetoothctlPower on Bluetooth, and pair with the adapter:
# Power on and scan
[bluetooth]# power on
[bluetooth]# agent on
[bluetooth]# default-agent
[bluetooth]# scan on

# Note the adapter's MAC address (XX:XX:XX:XX:XX:XX)

# Pair and trust the adapter
[bluetooth]# pair XX:XX:XX:XX:XX:XX
[bluetooth]# trust XX:XX:XX:XX:XX:XX
[bluetooth]# exit
Bind the adapter to an RFCOMM port:
$ sudo rfcomm bind /dev/rfcomm0 XX:XX:XX:XX:XX:XXUse the
/dev/rfcomm0port for connecting.
Pair the adapter via Bluetooth.
Identify the COM port assigned to the adapter:
chgportNote
You can also find the COM port in “Device Manager” under “Ports (COM & LPT)”.
Choose the corresponding COM port (e.g.,
COM7).Use this port for connecting.
Untested, help us improve this part of the documentation. Contribute
Connecting via Network (WiFi/Ethernet)
Use this method if your adapter connects over a network. WiFi and Ethernet adapters use the same network transport.
Connect to the adapter’s network (WiFi or Ethernet).
Determine its IP address and port.
Common defaults:
Address
Port
Device
192.168.0.1035000Generic
192.168.1.1035000Clones
Note
These values may vary. Refer to the adapter’s documentation for the correct IP address and port.
Use the IP address and port for connecting.
Advanced Connection
When instantiating a obdii.Connection, you can pass optional parameters to control how the connection is established.
Protocol Selection
By default, the library automatically detects supported protocols. When multiple protocols are available, the library selects the preferred one based on performance.
If you specify a protocol, the library will attempt to use it. If the requested protocol is unsupported, it will fall back to the next best available option.
1from obdii import Connection, Protocol
2
3# Create Connection with ISO 15765-4 CAN (29 bit ID, 500 kbaud)
4
5with Connection(
6    "COM10",
7    protocol=Protocol.ISO_15765_4_CAN_B,
8) as conn: ...
Example output showing protocol fallback:
2026-01-01 01:01:01 INFO     obdii.connection Attempting to connect to <TransportSerial COM10 at 38400 baud>.
2026-01-01 01:01:01 WARNING  obdii.connection Requested protocol ISO_15765_4_CAN_B cannot be used.
2026-01-01 01:01:01 INFO     obdii.connection Protocol set to ISO_15765_4_CAN.
2026-01-01 01:01:01 INFO     obdii.connection Successfully connected to <TransportSerial COM10 at 38400 baud>.
2026-01-01 01:01:01 INFO     obdii.connection Connection closed.
Auto Connect
auto_connect automatically attempts to connect when the obdii.Connection is instantiated.
Set it to False to disable this behavior. You will then need to call obdii.Connection.connect() manually.
Defaults to True.
Smart Query
smart_query is a small optimization that, when set to True, detects identical consecutive commands. Instead of sending the full command again, it sends a shorter special REPEAT command, reducing bus traffic and latency.
Defaults to False. This may not be supported by all adapters or vehicles.
Early Return
early_return is an optimization that, when set to True, makes the ELM327 respond immediately after receiving the expected number of responses, skipping the default timeout.
This reduces latency and increases polling speed for commands with a defined expected_bytes attribute.
Defaults to False. Requires an ELM327 v1.3 or higher.
Logging
This library logs errors and debug information using the standard logging module. When creating a obdii.Connection, a default logging configuration is applied to the obdii logger.
You can override this behavior by providing your own logging handler, formatter and level. By default, logs are configured with the logging.INFO level and written to sys.stderr using a colored formatter.
If you want the logging configuration provided by the library to affect all loggers rather than only obdii, set log_root=True.
 1from obdii import Connection
 2
 3from logging import DEBUG, Formatter
 4from logging.handlers import RotatingFileHandler
 5
 6handler = RotatingFileHandler(
 7    filename="obdii.log",
 8    maxBytes=32*1024*1024,
 9    backupCount=3,
10)
11
12formatter = Formatter(
13    "[{asctime}] [{levelname:<8}] {name}: {message}",
14    "%Y-%m-%d %H:%M:%S",
15    style='{',
16)
17
18with Connection(
19    "COM10",
20    log_handler=handler,
21    log_formatter=formatter,
22    log_level=DEBUG,
23    log_root=False,
24) as conn: ...
Disabling Default Logging Setup
If you are integrating obdii into a framework that manages its own logging, you may want to disable the library’s default logging setup entirely and let the framework handle it. This can be done by passing None to the log_handler parameter:
Logging will still work as normal through the obdii logger, but the configuration is now your responsibility.
Extra Keyword Arguments
Extra keyword arguments passed to obdii.Connection are forwarded to the transport type used by the connection.
Note
The transport type is automatically determined from the first argument passed to obdii.Connection (e.g., string for serial, tuple for socket).
These arguments are used when obdii.Connection.connect() is called, allowing transport-specific behavior customization, such as timeouts, baud rate, etc.
Currently, the library provides two native transport types, serial.Serial and socket.socket.
Refer to their respective documentation for the full list of supported parameters.
A common serial configuration example is shown below: